
Hello all!
Before we begin this post, I feel I should make my customary apology for being late in posting. It took me awhile to finish the project I wanted to share with you. And then it took me a far greater while to get around to blogging about it. But here I am again - I hope you enjoy this post!
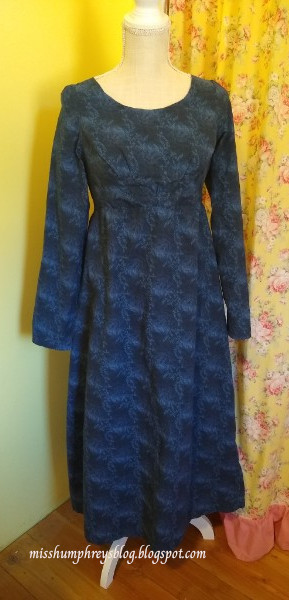

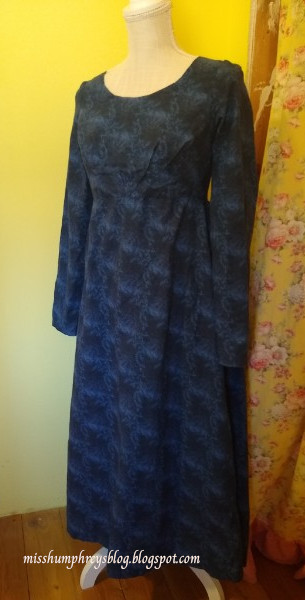
To introduce this dress, I'd like to tell you about one of my favorite fashion time periods: the 1820's-30's. I particularly like this era because of the waistlines. After the high regency waists, but before the introduction of the long waists of the 1840's, there's a certain in-between sweet spot that I tend to gravitate towards when I sew dresses. Here's a great example of the waistline I'm talking about, modeled by actors from one of my favorite movies, Wives and Daughters:
If you'd like to see dresses I've made with this waistline, scroll back through my blog. I discovered that, with minimal exceptions, every dress I've blogged sported it; today's dress included. Either I'm in a rut or I've found my "forever style."
I decided to take a regency pattern that my mother and I had made into regency jumpers, and simply lower the waistline to the desired length, shorten the dress for everyday use, and voila! I'd have the dress I wanted.
You'd think, right? I'm familiar with this pattern. Sounds simple enough, doesn't it? I thought so.
I started out making a sort-of toile, per my mother's advice. I didn't make a toile for the whole dress, but I did get a good idea of how much I wanted to lengthen the waist to make it 1820/30's length instead of regency length. I then unpicked my toile and used the pieces as my new pattern as I cut into my beautiful, midnight blue yardage.
The initial construction of the bodice (before I got to the sleeves, the darts, the shaping, and the zipper :) went quite well. I was pretty proud of myself for making a smooth, lined bodice with no seams showing on the inside.

If I had left the bodice at this point, it definitely would have been simpler. But I had decided that I wanted a long-sleeved dress instead of a jumper...so...
The downhill slide began when I was working on my first sleeve one evening. I inserted it inside-out - and then tore it down the side while I was unpicking *enthusiastically*. I cut out a new sleeve, which I decided to sew inside-out again for the sheer fun of it.
Around this point I turned the sewing machine off and abandoned the room to my two younger brothers, who were listening to my dressmaking catastrophes while building precarious structures out of Jenga blocks on the tile floor. Putting down the project at this point was a good choice ;)
I did get through the sleeves - finally! Except for an alteration I had to do towards the end of the whole project because one sleeve was puffing differently than the other. But the point is that I DID get them done.

Now on to the shaping of the bodice. I put darts in (multiple times) that were ultimately taken out a day or two later. They were replaced by double tucks, secured by top-stitching.


